
Emulate Raspberry PI with QEMU
You probably never want to try, but just in case, what if you want to emulate a arm processor running a Raspbian on your machine.
I really thought it was going to be a cozy walk in the park but quickly realize some things never get easy. In a single sentence, here is what we want to achieve today.
- Emulate a ARM based Raspbian on OSX
And here is how we are going to achieve it:
- Install QEMU, our ARM Prepare a 4.4.x kernel that can be boostrapped by qemu
- Get a recent Raspbian image for the filesystem
- Prepare the image to boot properly, by manually booting a shell and editing important files
- Boot a first time to see a familiar raspbian desktop
- Well.. that looked good but, the disk is to small, so let’s resize it
- Upgrade to the latest Raspbian packages.
- Run a simple nodejs express application with yarn
install qemu
You saw that one coming and yes, it’s not that hard to instal qemu, but every plateform of course has a its favorite different way to achieve it.
On OSX, we’ll use homebrew to install
brew install qemu
# takes some time
# As of writing, current version is:
# https://download.qemu.org/qemu-2.11.1.tar.bz2
On debian, apt or aptitude
sudo aptitude install qemu
On Arch Linux
sudo pacman -S qemu qemu-arch-extra bridge-utils
On windows, you can download the qemu binaries from here, or directly to the windows binaries.
Check the different ARM systems
Well, QEMU can emulate a wide range of machine, and CPUs. If the binaries are properly installed on your system, you can quickly use the two one liners below to check what machines and cpus are available.
qemu-system-arm -machine ?
With the possible output.
Supported machines are:
akita                Sharp SL-C1000 (Akita) PDA (PXA270)
...
raspi2               Raspberry Pi 2
...
versatileab          ARM Versatile/AB (ARM926EJ-S)
versatilepb          ARM Versatile/PB (ARM926EJ-S)
vexpress-a15         ARM Versatile Express for Cortex-A15
vexpress-a9          ARM Versatile Express for Cortex-A9
...
You can also find out what cpu can be used for the given hardware using:
qemu-system-arm -M versatilepb -cpu '?'
With the possible output below:
Available CPUs:
  arm1026
  arm1136
  arm1136-r2
  arm1176
...
download and extract kernel
QEMU installed, we now need a QEMU compatible kernel to boot our system. dhruvvyas90 regularly provides kernel images.
curl -OL https://github.com/dhruvvyas90/qemu-rpi-kernel/raw/master/kernel-qemu-4.4.34-jessie
export RPI_KERNEL=./kernel-qemu-4.4.34-jessie
download and extract filesystem image
Now we need a filesystem image, with the usual raspbian disk image. We’re taking an old one here, but recent ones would do it to.
curl \
-o 2017-03-02-raspbian-jessie.zip \
-L http://downloads.raspberrypi.org/raspbian/images/raspbian-2017-03-03/2017-03-02-raspbian-jessie.zip

unzip 2017-03-02-raspbian-jessie.zip
export RPI_FS=./2017-03-02-raspbian-jessie.img
First time boot
We’ll use qemu-system-arm to run our qemu commands. Let’s create a short cut for it. On first boot, we need to fix a few files so that the system can run properly with qemu, and so we’ll boot the kerel in an emergency mode like so we can edit those files.
export QEMU=$(which qemu-system-arm)
The standard way
Let’s now boot the raspberry with a bash prompt using the qemu command below.
$QEMU \
  -kernel $RPI_KERNEL \
  -cpu arm1176 \
  -m 256 \
  -M versatilepb \
  -no-reboot \
  -serial stdio \
  -append "root=/dev/sda2 panic=1 rootfstype=ext4 rw init=/bin/bash" \
  -drive "file=$RPI_FS,index=0,media=disk,format=raw"
As we have sed, (pun intended) some files present on the raspbian image, are preventing a full boot from qemu. We do some seding, to edit the three files below, and comment out the problematic loading/preloading.
sed -i -e 's/^/#/' /etc/ld.so.preload
sed -i -e 's/^/#/' /etc/ld.so.conf
Next is to either disable mount information from fstab:
sed -i -e 's/^/#/' /etc/fstab
or use a udev rule, so that the mounted drive can be mapped and recognized properly from within qemu. In this case, add the content below to file: /etc/udev/rules.d/90-qemu.rules
KERNEL=="sda", SYMLINK+="mmcblk0"
KERNEL=="sda?", SYMLINK+="mmcblk0p%n"
KERNEL=="sda2", SYMLINK+="root"
second time boot
Now is the time for a second boot, where we can go to the full desktop version of raspbian.
$QEMU \
  -kernel $RPI_KERNEL \
  -cpu arm1176 \
  -m 256 \
  -M versatilepb \
  -no-reboot \
  -serial stdio \
  -append "root=/dev/sda2 panic=1 rootfstype=ext4 rw" \
  -drive "file=$RPI_FS,index=0,media=disk,format=raw" \
  -net user,hostfwd=tcp::5022-:22,vlan=0
And .. it works !
Without booting, by mounting the filesystem contained in the img file.
Yes this is also possible if you’re on linux. You can mount the img filesystems, and edit files directly on them.
below is mostly copied from ownyourbits
# prepare the image
SECTOR1=$( fdisk -l $RPI_FS | grep FAT32 | awk '{ print $2 }' )
SECTOR2=$( fdisk -l $RPI_FS | grep Linux | awk '{ print $2 }' )
OFFSET1=$(( SECTOR1 * 512 ))
OFFSET2=$(( SECTOR2 * 512 ))

mkdir -p tmpmnt
mount $RPI_FS -o offset=$OFFSET1 tmpmnt
touch tmpmnt/ssh   # this enables ssh
umount tmpmnt

mount $RPI_FS -o offset=$OFFSET2 tmpmnt
cat > tmpmnt/etc/udev/rules.d/90-qemu.rules <<EOF
KERNEL=="sda", SYMLINK+="mmcblk0"
KERNEL=="sda?", SYMLINK+="mmcblk0p%n"
KERNEL=="sda2", SYMLINK+="root"
EOF

umount -l tmpmnt
Networking
I found out that the easiest was probably to just use the deprecated -net nic,vlan=0 setting to the qemu command. The other settings I found here and there did not make it for me.
$QEMU \
  -kernel $RPI_KERNEL \
  -cpu arm1176 \
  -m 256 \
  -M versatilepb \
  -no-reboot \
  -serial stdio \
  -append "root=/dev/sda2 panic=1 rootfstype=ext4 rw" \
  -drive "file=$RPI_FS,index=0,media=disk,format=raw" \
  -net user,hostfwd=tcp::5022-:22,vlan=0 \
  -net nic,vlan=0
With this, you can ping the outside world ! Nice.
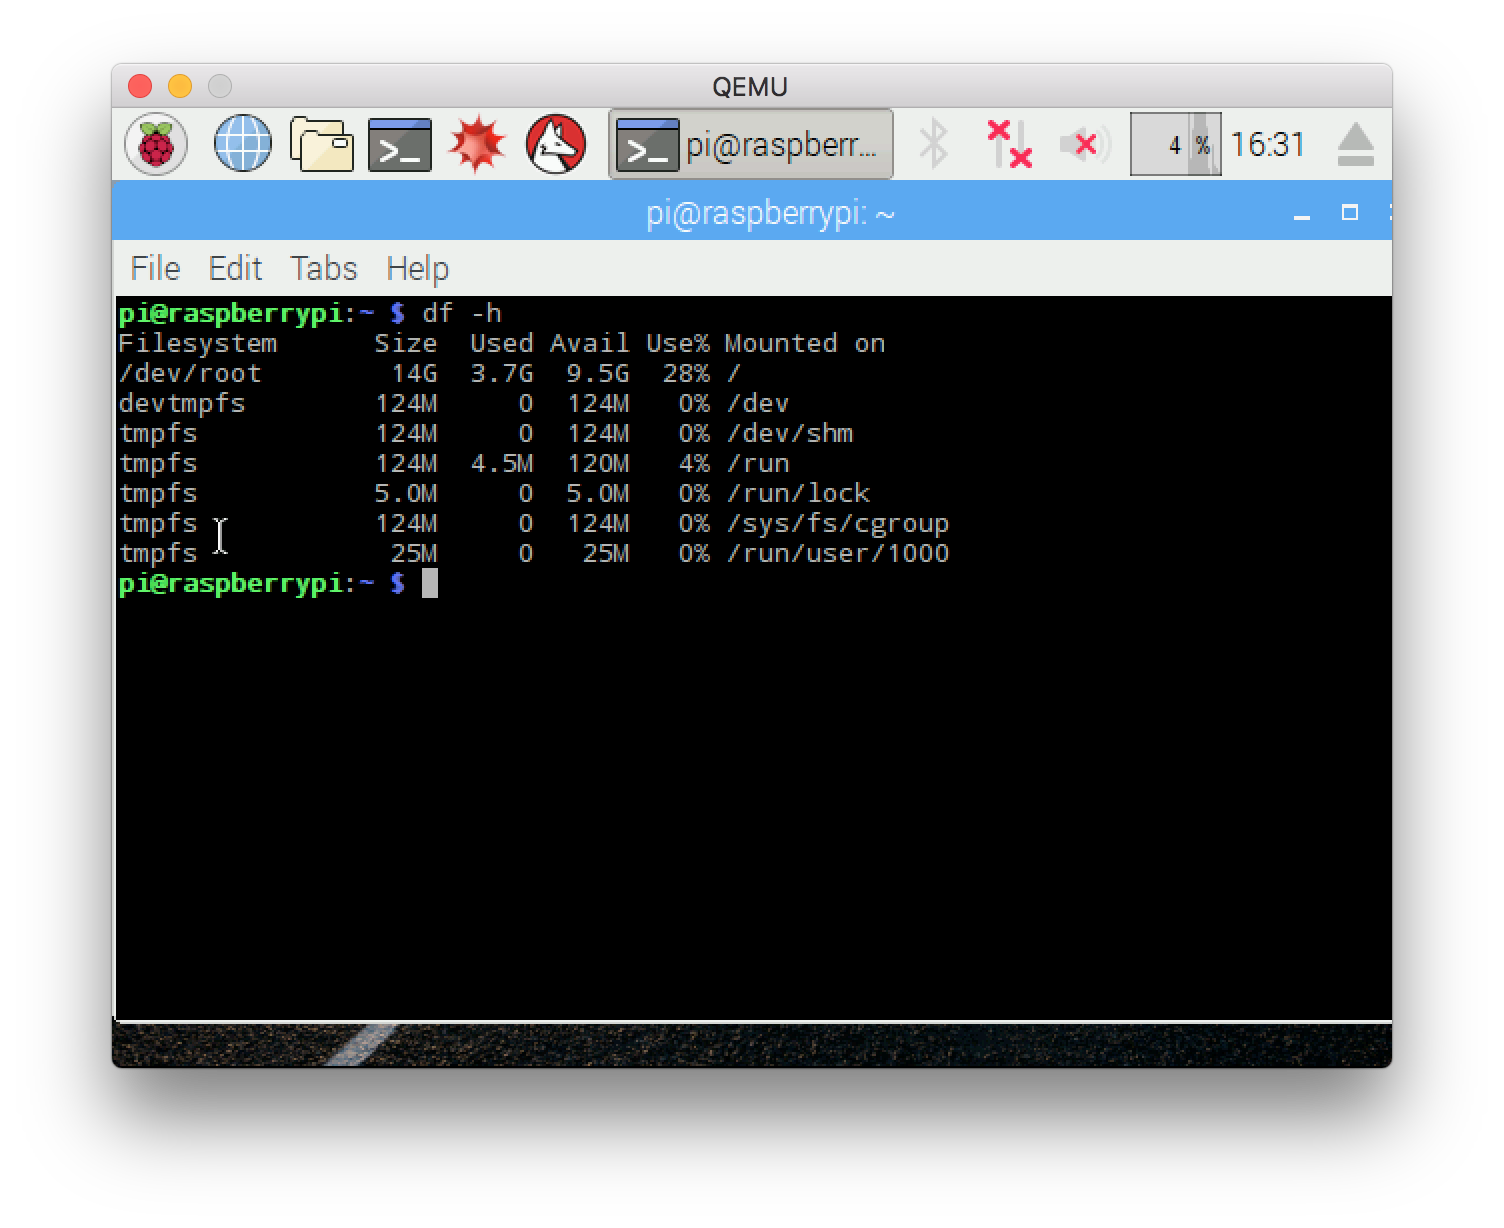
Resizing the Filesystem
Well, up to now, things went smootly, but you can’t really do much with this image because the filesystem has no pretty much zero space left.
Let’s create some.
First, let’s resize the base img file by using qemu-img on the host first.
# on the host
qemu-img resize 2017-03-02-raspbian-jessie.img +10G
Then booting the raspberry in shell mode again, we can use both fdisk and resize2fs to get the root partition to be the size we want it to be.
# on the raspberry
fdisk /dev/sda
# delete root partition (/dev/sda2)
# d

# create a new parition
# c

# start of new partition as before
# end is computed
# save
# w

# need a fake mtab file so resize2fs can run
touch /etc/mtab

# resize using resize2fs
resize2fs /dev/sda2
 no
no
Login and Upgrade
Let’s try to login via SSH.
Well the SSH deamon is not running. so let’s start it first.
sudo systemctl enable ssh
sudo systemctl start ssh
And then we can ssh to the pi with the forwarded SSH port.
ssh pi@localhost:5022
# reminder: password is raspberry
And now is the time for a fresh upgrade. This takes … A LOT OF TIME ….
# update
sudo apt update
sudo apt upgrade
Increase the number of cores used
This is the command that could be used:
$QEMU \
  -kernel $RPI_KERNEL \
  -cpu arm1176 \
  -m 256 \
  -smp cores=2,threads=1,sockets=1 \
  -M versatilepb \
  -no-reboot \
  -serial stdio \
  -append "root=/dev/sda2 panic=1 rootfstype=ext4 rw" \
  -drive "file=$RPI_FS,index=0,media=disk,format=raw" \
  -net user,hostfwd=tcp::5022-:22,vlan=0 \
  -net nic,vlan=0
but the ARM backend used to run the raspberry only support one core. Too bad.
NODEJS
Now the icing on the cake, this exercice was done to actually test some NodeJS code running on ARM.
I use YARN for just about everything JavaScript these days.
curl -sS https://dl.yarnpkg.com/debian/pubkey.gpg | sudo apt-key add -
echo "deb https://dl.yarnpkg.com/debian/ stable main" | sudo tee /etc/apt/sources.list.d/yarn.list
sudo apt-get update && sudo apt-get install yarn
Oh … nodejs is going away !!!
The following packages will be REMOVED:
  nodejs nodejs-legacy nodered
The following NEW packages will be installed:
  yarn
But it’s actually a pretty old version. Let’s try using the official documentation from nodesource:
# curl -sL https://deb.nodesource.com/setup_9.x | sudo -E bash -
# does not work
The best way I found is to actually download the proper tar.gz and extract on your virtual arm machine.
# download from https://nodejs.org/dist/v10.0.0/node-v10.0.0-linux-armv6l.tar.xz
And we get something rather new running now:
pi@raspberrypi:~ $ node -v
v10.0.0
Let’s create a new folder, with the minimal amount of work for an express application index.js and package.json:
const app = require('express')()
const exec = require('child_process').exec;
app.get('/', (req, res) => {
  exec("uname -a", (error, stdout, stderr) => {res.send(stdout) })
})
app.listen(3333, () => console.log('Ready'))
and
{
  "name": "hello",
  "version": "1.0.0",
  "dependencies": {
    "express": "^4.16.3"
  },
  "scripts": {
    "start": "node index.js"
  }
}
Now we can get the dependencies and start the express app with yarn:
yarn install
yarn start
To open a new port without bridge networking setup, let’s add a new port forward to the qemu command. In this second command we now map port 3333 to 3333 on the host.
$QEMU \
  -kernel $RPI_KERNEL \
  -cpu arm1176 \
  -m 256 \
  -M versatilepb \
  -no-reboot \
  -serial stdio \
  -append "root=/dev/sda2 panic=1 rootfstype=ext4 rw" \
  -drive "file=$RPI_FS,index=0,media=disk,format=raw" \
  -net user,hostfwd=tcp::3333-:3333,hostfwd=tcp::5022-:22,vlan=0 \
  -net nic,vlan=0
Voila:
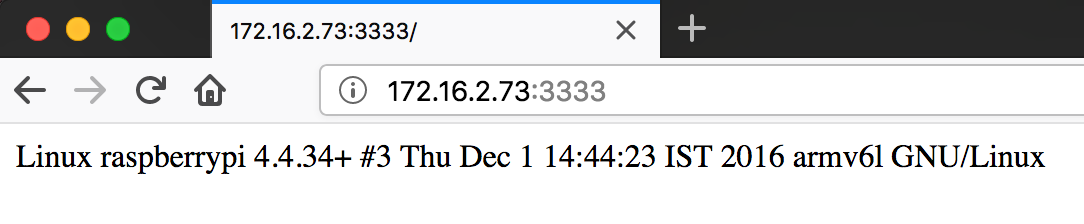
And see uname information showing when accessed from the host, to the host IP and on the forwarded raspberry port.
References and Inspiration
- main reference to install raspbian https://gist.github.com/hfreire/5846b7aa4ac9209699ba
- second reference https://ownyourbits.com/2017/02/06/raspbian-on-qemu-with-network-access/
- resize img disk https://gist.github.com/larsks/3933980
- RPI Kernels https://github.com/dhruvvyas90/qemu-rpi-kernel/wiki
- Raspbian Images http://downloads.raspberrypi.org/raspbian/images/
- ARM on Debian/Ubuntu https://gist.github.com/Liryna/10710751
- CopyingIMG files to SD card https://www.raspberrypi.org/documentation/installation/installing-images/